Molecule Construction Set

Requires a Wolfram Notebook System
Interact on desktop, mobile and cloud with the free Wolfram Player or other Wolfram Language products.
This Demonstrations lets you create an unlimited number of different molecules and structures from the ground up.
[more]
Contributed by: Karl Scherer (May 2012)
Open content licensed under CC BY-NC-SA
Snapshots
Details
Version 8
The default setup
As a start, move the sliders in the default setup.
If an atom is invisible because it is outside the screen, zoom out (and rotate the project in space) with your mouse.
Important: Please read further down how "action = fastdraw" can speed up your design process.
Controls:
Over 100 controls are now implemented, and many are new or altered in this update; so please read the descriptions carefully!
"project" pop-up menu
Here you can call up a prefabricated configuration, which you can edit and add to as much as you like.
Examples:
Project 1:  , project 2:
  O, projects 5 and 8: graphene, project 9: methane, project 11:
  buckyball, project 12:
  ,
,
project 14: butyl methyl sulfide (the world's smallest motor, see http://www.sciencedaily.com/releases/2011/09/110904140353.htm),
project 15: boron (research has shown that boron can be made in flat sheets with hexagonal holes, see http://news.rice.edu/2012/04/20/flat-boron-may-take-many-forms-2/).
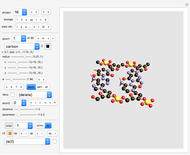
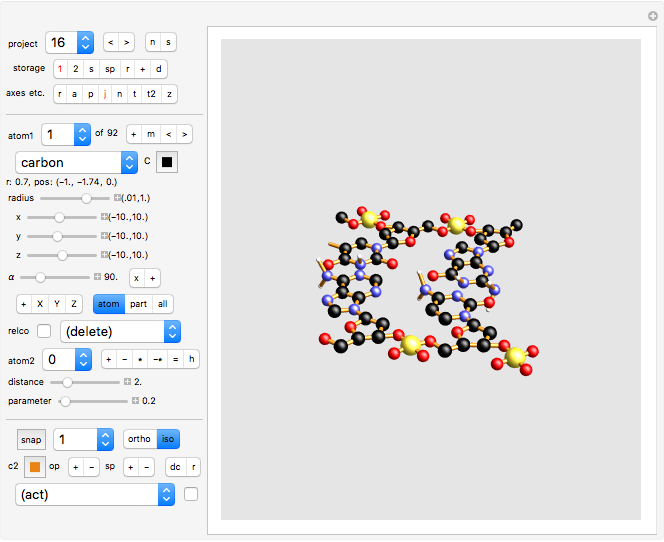
project 16: part of a DNA spiral, with an adenine-thymine pair at the top, and a cytosine-guanine pair at the bottom. The left and right backbones are built from phosphate-deoxyribose.
projects 17, 18: carbon nano tubes.
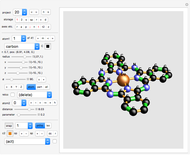
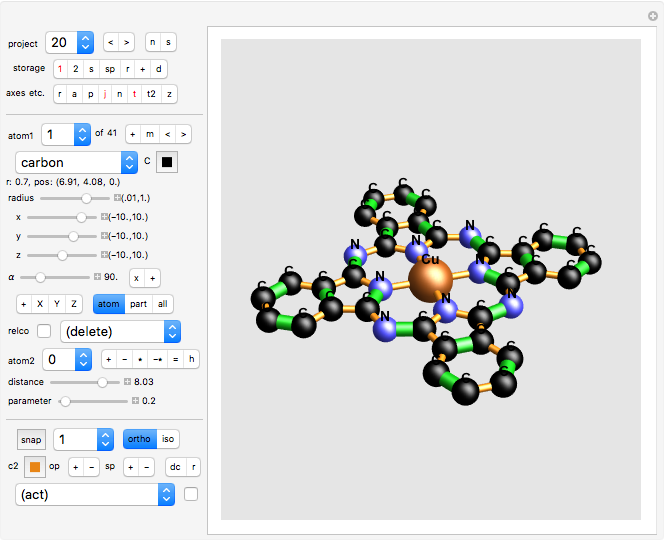
project 20: Phthalocyanine Blue (blue pigment) : note the many double bonds
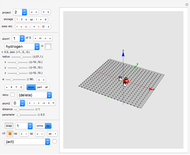
project 21: an orthogonal grid, produced by exercise 8.
"n" (new)/"s" (save)" setter bar
Clicking "n" creates an additional project.
Clicking "s" saves the current project.
"storage" setter bar (1/2/s/sp/r/+/d)
Click "1" or "2" to activate one of two temporary storage areas for the current project. The active storage turns red. Note that these storages are kept independent of the projects; thus you can use them to copy creations from one project to another.
Click "s" to save the current project in one of the two temporary storage areas.
Click "sp" to save the current connected part in one of the two temporary storage areas.
Click "r" to restore the stored project (or part) from one of the two temporary storage areas.
Click button "+" to add the selected stored configuration to the existing creation (at the start the two storages contain a regular pentagon and a regular hexagon positioned at the origin, see also button "d").
Click button "d" to reset the storage contents to the defaults (storage1 = hexagon and storage2 = pentagon of carbon atoms).
"axes etc" setter bar (r/a/p/j/n/t/t2/z)
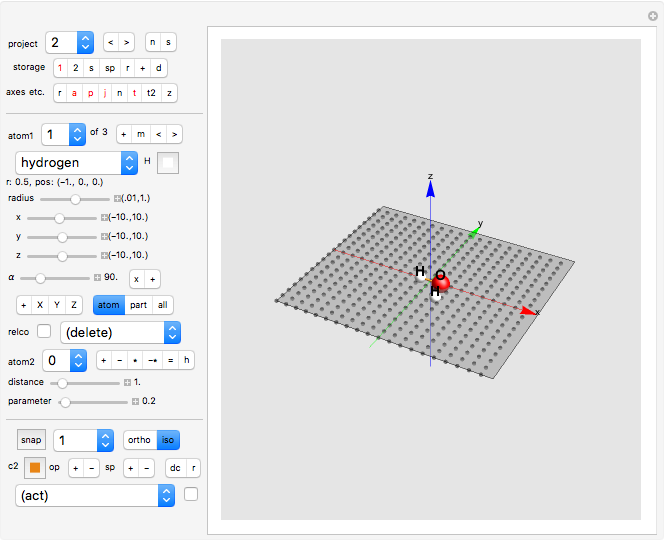
Click "r" to display x-y-z-rulers.
Click "a" to display coordinate axes.
Click "p" to display a floor piece in the x-y-plane.
Click "j" to display any stored links between atoms.
Click "n" to display the serial number of each atom. The number will appear just above each atom.
Click "t" to display the chemical element of each atom. The chemical name will appear just above each atom.
Click "t2" to display the atomic number with each atom.
Click "z" to display the projection (in the form of black lines) of each atom onto the x-y-plane. This helps to visualize the position of each atom in the three dimensions.
All data associated with this setter bar is stored with the project.
"plot range" setter bar (All/F1/F2/F3/F4)
Here you can choose several plot ranges of your project ("All" or 40x40x40 or 20x20x20 or 10x10x10 or 4x4x4). The plot range is stored with the project.
"atom1" pop-up menu
Select which atom you want to edit. The total number of atoms in your project is also displayed.
"+/m/" setter bar
Click "+" to duplicate the current atom (or all atoms of the molecule or all atoms of your project, depending on which mode is active). The copies will be positioned at the same position as the originals. No links are copied. Use the x/y/z sliders to separate the copies from the originals. See also the action "copy" further down, which works differently.
Click "m" (mark) to have a black arrow mark the currently edited atom and a brown arrow mark atom2. Click again to switch off the arrows.
Click "<" to make the previous atom the current one.
Click ">" to make the next atom the current one.
atom type pop-up menu
Here you can associate a chemical name (like "oxygen") to your atom.
To the right of this menu the chemical sign ("O" for "oxygen") will appear. Also the color ("color1") for this atom is displayed, which you can change by clicking it.
You can also set the color to the default color for this chemical element by clicking the "defcol" button further down.
In the following line the radius (r=...) and the position (pos:...) of the currently edited atom ("atom1") is displayed.
"radius", "x", "y", "z" sliders
They control the radius and the position of the currently edited atom.
"α°" slider
Here you can define an angle (in degrees) by which the current atom (or a connected part of your creation or all of it) will be rotated. This rotation will be around an axis which is defined by the next two controls and by the "atom2" pop-up menu.
The setter bar consisting of a "x/y/z/L/O" button and a "+" (do) button controls rotations
This rotation given by the "α" slider will be around an axis which is given as follows:
Click the x/y/z/L/O button repeatedly to cycle through the four settings.
"x/y/z" settings:
The rotation will be around the x-, y- or z-axis at origin (if "atom2" is "0") or around the corresponding axis positioned at "atom2"; the connecting link must be missing.
"L" setting:
The rotation will be around the line from the origin to the current atom (if "atom2" is "0") or around the line from the current atom to "atom2" (the connecting link does not actually have to be established for this).
"O" setting:
The rotation will be around the line from the origin to "atom2" (if "atom2" is given, otherwise around the z-axis).
The "+" button:
Click "+" to execute the rotation. You can click "+" repeatedly to rotate the atom again by the same increment.
The rotation applies either to the current atom or to the current part (molecule) or to your whole creation, depending on which of the modes "atom/part/all" have been chosen. If you want to rotate part of a molecule you might have to sever a bond (link) first, then rotate your part, and finally reconnect the part. See exercise 3 for a practical example.
The "+/X/Y/Z" setter bar controls shifts
Clicking "+" turns it into "-" and vice versa. This controls whether the incremental shifts are in a positive or negative direction.
Click "X" to shift the atom/part/all into the x direction by one mesh unit ( similar with "Y" and "Z"). The mesh unit (1, .5 or .25) is set next to the "snap" button (see further down).
The "atom/part/all" setter bar controls what object size is being processed
This control influences a lot of other controls!
If "atom" is active, the  ,
,  ,
,  and
and  sliders will cause movements of the current atom only. Also, shifts ("X/Y/Z") and most "actions" will only affect the current atom.
If "part" is active, the  ,
,  ,
,  and
and  sliders will cause movements of the part (molecule) connected to the current atom. Also, shifts ("X/Y/Z") and most "actions" will only affect the currently edited connected part (molecule).
If "all" is active, the  ,
,  ,
,  and
and  sliders will cause movements of all atoms. Also, shifts ("X/Y/Z") and most "actions" will affect your whole creation.
"relco" (relative coordinates) toggle allows micro-control of the atom's position
When the "relco" toggle is activated, the  ,
,  , and
, and  sliders show relative coordinates instead of absolute coordinates.
Example: shifting the  slider to "1" will move the current atom (or part of it or all of it, depending on the chosen atom/part/all mode) by one unit in the x-direction.
NOTE: none of the other controls is available while the "relco" box is ticked!
To make precise small changes (micro-control) to the position of the currently edited atom, select "action = slider/2" one or twice BEFORE you click the toggle! Click "relco" again to deactivate it.
"(delete)" pop-up menu It allows you to - delete the current atom - delete the nearest atom - delete all atoms with a smaller sequence number - delete all atoms with a higher sequence number - delete the currently edited connected part (molecule) - delete all atoms except the currently edited connected part - "keep n'hood": delete all atoms except the ones in the neighborhood of the current atom. The neighborhood of an atom are all atoms which are connected to the current atom. - delete all atoms of current type - delete all atoms except the current one. Some restrictions apply since you cannot delete the last atom.
"atom2" pop-up menu
The second atom is used to create links and special rotations, to measure and set distances, and for "action = mirror at atom2".
If a number > 0 is selected and the link does not exist yet, then the link will be indicated (!) as a brown line. The actual link can then be created by clicking "+"; see below.
The line between the two given atoms is the axis of rotation for rotation mode "L", even when the link as such does not exist.
"+/-/*/-*/=/h" setter bar
"+" creates a link from the current atom to "atom 2". Click again to create a double bond (with twice the thickness of a standard bond).
"-" deletes the selected link (bond), if there was one.
"*" creates links (bonds) between "atom2" and all atoms of the connected part that includes atom1 (if "part" is active in "atom/part/all"). If "all" is active, then atom2 is linked to all other atoms."
"-*" deletes all links (bonds) to the current "atom1".
"=" merges "atom2" with the atom1. All links to "atom2" will now connect to the atom1 instead. If "atom2" is not given, the system will search for the atom closest to the atom1 and then merge it with the current atom. See also "action = merge close" below.
Note that "atom B merging with atom A" has a different result from "atom A merging with atom B", since the surviving atom will be at a different place.
"h": clicking it will create a new atom halfway between the two given ones. The new atom will be connected to the two given atoms.
"distance" slider
The distance slider can be used passively and actively.
If untouched, it shows the distance between "atom1" and "atom2". If no target atom is given, it shows the distance between atom1 and the origin {0,0,0}.
Move the slider to change the distance between the two atoms. Atom1 will be moved accordingly along the line between the two atoms. If "atom2" is not given, atom1 will slide along the line through atom1 and the center {0,0,0} and can be thus translated to the origin.
If "part" mode is selected in "atom/part/all", then moving the distance slider will cause the current connected part (molecule) to slide in unison with atom1.
For small distances close to "dist=0" the sliding can be improved by clicking "action = sliders/2" once or twice, thus decreasing the range of the slider.
If you want to set the distance to exactly zero, then "action=move to..." is more precise and easier to use.
"parameter" slider
Multi-purpose slider whose value is used by several "act" options.
"snap" button and mesh parameter 1/.5/.25
Click the "snap" button to position an atom/part/all atoms on a three-dimensional integral grid, which means that all coordinates of the atoms are rounded to integers (or multiples of .5 or .25, depending on the choice of mesh parameter 1/.5/.25 next to it). Note that the "shift" setter-bar "+/X/Y/Z" also uses the mesh parameter.
There is also a special action "move to atom2" that is similar to "snap", but does not use the grid spacing parameter.
"ort/iso" (orthogonal/isometric grid) setter bar
The options "ort" and "iso" refer to the orthogonal (90 degree) grid and an isometric (60 degree) grid.
The setting influences the "snap" action and the floor displayed ("axes etc = p").
In the "iso" mode the  coordinates are "snapped" to multiples of sqrt[3]/2 if "snap" is clicked.
This allows to create regular triangles and hexagonal lattices (such as graphene) with precision.
The grid type is stored when you save a project.
"c2" (color 2 swatch)
Color used by some "actions", see below.
"op" (opacity) setter bar (+,-)
Click button "+" to increase the opacity of atoms and links, click "-" to decrease it. Note that coordinate axes, sequence numbers, chemical signs and atomic number are not affected (they always have opacity 1).
"sp" (specularity) setter bar (+,-)
Click button "+" to increase the specularity of atoms and links, click "-" to decrease it.
"defcol/r" setter bar
Click "defcol" to replace the current atom color with the default color associated with the current atom type.
For example, a gold atom will show a golden color as default (which you can overwrite by selecting a different color).
This default coloring applies to the current atom or the currently edited connected part (molecule) or all of your creation, depending on which of the atom/part/all modes is active.
Click "r" to change the current atom's radius to the default radius associated with the current atom type (as published in the scientific literature). This default radius applies to the current atom or the currently edited connected part (molecule) or all of your creation, depending on which of the atom/part/all modes is active.
An atomic radius size of one unit corresponds to 100 nanometers in this Demonstration. You will see that a lithium atom is much larger than a carbon atom, for example.
"(action)" pop-up menu
Option "fastdraw" speeds up the design process by displaying simpler graphics: dots are displayed instead of spheres, lines instead of tubes, and only one size of atoms is used. Click "fastdraw" again for full display of spheres and links.
Option "atom at {0,0,0}" creates a copy of the current atom at the origin.
Option "x -> -x" turns the " " coordinate of the current atom to "-
 "; this also applies to "y -> -y" and "z -> -z". The action applies to one atom, or a whole molecule, or to all molecules displayed, depending on which of the atom/part/all modes is active.
Option "mirror-move" moves the current atom (or a connected part, or all atoms at "atom 2", depending on which of the atom/part/all modes is active) to a position mirrored at atom2. If "atom 2" is not given, then the mirroring is at the origin (all coordinates  turn to
  ). Note that the connecting links are moved at the same time.
Option "mirror-create" creates a new atom at a position mirrored at atom2. If "atom 2" is not given, then the mirroring is at the origin (all coordinates  turn to
  ). Note that no new connecting links are created in this process. The new atom (atom3) will be made the current atom (atom1). To create a link from atom2 to atom1 simply click the little "+" sign to the right of the "atom2" pop-up menu.
Option "move to..." shifts the current atom/part/creation, depending on which mode is active. The shift will be such that the current atom ends at the position of "atom2" (or at {0,0,0}, if atom2 is 0). This tool is very useful when you want to join two molecules. Select one atom in each of the two molecules you want to join (by setting "atom" and "atom2"), then select "action=move to..." . This will cause the two atoms to overlap. To merge the two overlapping atoms, simply select "action = merge" or click "=" in the "+/-/*/-*/=/h" setter bar.
Option "split atom" duplicates the current atom and all its links. The copy will be positioned at the same place as the original. Use the x/y/z sliders (or X/Y/Z shift) to separate the original from the copy.
Option "split + link" splits the current atom (see above), and also links the copy to the original atom. Use the x/y/z sliders (or X/Y/Z shift) to separate the original from the copy.
Option "copy a/p/all" duplicates the current atom/part/creation, depending on which mode is active. The copy will be positioned at the same place as the original. Use the x/y/z sliders (or X/Y/Z shift) to separate the original from the copy.
Option "copy + link" copies the current atom, and links the copy to the original atom.
Option "halfway" creates a new atom halfway between the current atom and "atom2" or - if "atom2" is not given - between the current atom and the origin.
Option "create center" creates a new atom at the center of mass of all atoms in the current connected part or in the whole creation, depending on which of the atom/part/all modes is active (mode "atom" will be treated here as mode "part" for convenience).
Option "merge close" merges all pairs of atoms that are close to each other (distance less than .2). See also merge option "=" of the "+/-/*/-*/=/h" setter bar.
Option "type part/all" makes all atoms of the currently edited molecule having the same type. If "all" mode is active, then all parts of your creation are affected.
Option "color1 part/all" paints the atoms of the currently edited part (molecule) with the color of atom1. If "all" mode is active, then all parts of your creation are affected.
Option "color1 type" paints all atoms of the currently displayed atom type (such as "oxygen") with the color of atom1.
Option "type color" sets the types of all atoms having the current color to the type of atom1.
Option "rnd col a/p/all" paints one or more atoms with a random color, depending on which of "atom/part/all" is currently active.
Option "radius a/p/all" makes the radius of one or more atoms of the currently edited part (molecule) the same size. If "all" mode is active, then all parts of your creation are affected.
Option "radius type" changes the radius of all atoms of the currently displayed atom type (such as "oxygen") to the size of the current atom.
Option "radius*parm a/p/all" changes all radii (of atom/part/all) by a common factor (namely by the value of the "parameter" slider).
Option "parm link dia" changes the link diameter to the value of the "parameter" slider.
Option "size*parm a/p/all" resizes the x-,y- and z-cordinates of your atom/part/creation by the value of the "parameter" slider. Option "x*parm a/p/all" resizes the x coordinates of your atom/part/creation by the value of the "parameter" slider. Option "y*parm a/p/all" resizes the y coordinates of your atom/part/creation by the value of the "parameter" slider. Option "z*parm a/p/all" resizes the z coordinates of your atom/part/creation by the value of the "parameter" slider.
Option "color2 backgr" makes color "col2" the background color.
Option "color2 links" paints all links with the color "col2". The default color for links is golden. The link color is stored with the project.
Option "color2 dbl bonds" paints all double bonds with the color "col2". The default color for double links is golden. The double link color is stored with the project.
Option "color2 atoms" paints one or more atoms with color "col2", depending on which mode of "atom/part/all" is active.
Option "link to nearest" creates links between the current atom and its nearest neighbor(s). If "part" mode is active, then all atoms in the current molecule are linked to their nearest neighbor(s). If "all" mode is active, then all atoms are linked to their nearest neighbor(s). All this is only true as long as "parameter" is not larger than 1, otherwise the distance to the closest neighbor is multiplied by the parameter value and all atoms in this sphere are linked to.
Option "link nearest ext" creates links between the current atom and its nearest external atom(s). External atoms are those which are not part of the current connected part. If "part" mode is active, then all atoms in the current molecule are linked to their nearest external neighbor(s). If "all" mode is active, then all atoms are linked to their nearest external neighbor(s). Depending on the number of atoms in your project, this option may take a while to process (indicated by the text "link nearest ext" showing until the processing has finished).
Option "delete links of atom1" deletes all links containing the current atom (atom1).
Option "delete links" deletes all links of the current atom1 or all links in the molecule or all links of your project, depending on which mode of "atom/part/all" is active.
Option "reset project" resets the current project to its default values. Any changes by you will be undone!
Option "sliders ×2" doubles the range of all sliders (except the rotation slider). Option "sliders /2" halves the range of all sliders (except the rotation slider).
Option "text size 14" and "text size 20" defines the size of the sequence numbers, chemical signs and atomic number.
Option "parm -> thickn" defines the line thickness during "fastdraw" mode.
Option "parm=n -> n-gon" creates a regular n-gon with radius 2 at the origin, where the number of edges "n" is given by the value of the "parm" slider.
Option "delete dbl bonds" deletes all double bonds (and displays them as single bonds).
action repeat button
Click the toggle to the right of the "action" pop-up menu to repeat the last action.
Hints
- Remember that you can rotate your project in space and also zoom in and zoom out at any time (use mouse wheel)!
- When working with this Demonstration it is mostly useful to know the sequential number of each atom. For this purpose simply switch on option "n" (numbers) of the "axes etc" setter bar, and switch off option "t" (chemical symbols) from the same setter bar.
- The sequential numbers are hard to see next to black carbon atoms. You can improve visibility by choosing a lighter color for one carbon atom and then select action "color -> type". You can also change the text size by selecting the action "text size = 14" or "text size = 20". You can also reduce the opacity, because numbers and types are unchanged by the opacity control.
- Remember that the storages 1 and 2 contain default molecules, namely a hexagon and a pentagon ring of carbons atoms (each with a side length of 2). After overwriting the storages you can get the defaults back by clicking "d" in "1/2/s/sp/r/+/d". Click "+" to add a carbon ring to your project at any time. The DNA in project 16 has been created this way.
- Resize: To resize your part/all (e.g., by 50%), set "parm" to .5 and select action=size*parm.
- For white atoms (such as hydrogen) the color swatch to the right of the "type" pop-up menu is invisible since the background of the color swatch is also white. Clicking it will show to you that it is still there.
- In this text we use "link" rather than the term "bond" from chemistry, and "part" or "connected part" for "molecule". On the other hand, instead of "atom" you could use "ball", "orb" or "sphere".
- If you see a thin brown line between two atoms and you want to get rid of it, select "atom2 = 0".
- to rotate or move several parts in unison, connect the parts temporarily with a link between two of their atoms, rotate/move them as one part, then delete the temporary links. As an exercise, apply this to the  buckyball with the captured inner atom (project 11) to make two copies.
- To copy an atom/connected part/whole project including the associated links, use the "split" action. You can also save the current atom/part/project with the "storage" option "s" and copy it to your current project with the "storage" option "+".
Exercise 1: hide carbon atoms
In scientific publications carbon atoms often are left out of diagrams, such that only the bonds are displayed. In this demonstration we easily achieve this: Select project 16 (DNA) or project 20, set r=0, then in pop-up menu "action" select option "radius -> type".
Exercise 2: layers
To create the many layers of project 6, we start with one layer in the  plane. We click "part" of the "atom/part/all" setter bar, then select "copy" from the "action" pop-up menu. Finally, we separate the new copy from its original by clicking "Z" twice. To give the atoms of the copy a new uniform color, change the color of the current atom and select "action = color part/all".
Exercise 3: joining two molecules
We start with the methanol molecule in project 9. How can we make a copy and join it with the original?
Select "axes etc. = n" to show the sequential numbers of the atoms, and switch "axes etc. = t" off. Click "part" of the "atom/part/all" setter bar, then select "copy" from the "action" pop-up menu. Separate the two copies with the  slider so that you can read the numbers. To join the two molecules at hydrogen atoms 2 and 12 , select 2 as "atom1" and 12 as "atom2". Now select action "move to atom2". Finally, select action "merge close" to merge the two overlapping hydrogen atoms.
Exercise 4: rotation of a part
In project 9, select "axes etc. = n" to show the sequential numbers of the atoms. We want to rotate the CH3 group (atoms 1,2,4,5) around the axis given by atoms C and O (numbers 4 and 3). Here is how we accomplish this:
Select "part" in the "atom/part/all" setter bar. Select "atom1 = 4" and "atom2 = 3" and delete the link between atom1 and atom2 (click "-" in the "+/-/*/-*/=" setter bar). Select "α° = 14" (for example), click "x" to the right of the α slider again and again to get the "L" (link) rotation mode appearing next to the "+" button. Click this "+" button repeatedly; you will see the CH3 group rotating while the OH group at the top remains fixed. Finally, reconnect the two severed parts by clicking "+" in the "+/-/*/-*/=" setter bar.
What would happen if we selected atom1=3 and atom2=4? The CH3 would stay still, and the other two atoms would rotate around the axle through atom1 and atom2.
Now repeat the exercise, this time without severing the O-C connection. What will happen?
Exercise 5: rotation of a connected part around an arbitrary axle in 3-D.
"Exercise 4" above showed how to rotate a part around an axle defined by two existing atoms, both belonging to your project. Now suppose you want to rotate a molecule around an arbitrary axle in space given by two atoms A and B which are not part of your project. Select "part" in the "atom/part/all" setter bar. Link A and B by setting atom1=A and atom2=B and clicking "+" in the "+/-/*/-*/=" setter bar. Now select an atom C from the part you want to rotate and link it to atom 1. Trigger the rotation as in exercise 4. Finally delete A and B or just unlink A and C (if you want to keep A and B).
Exercise 6: creating a carbon nano tube with just a few clicks We start with project 18, where two carbon rings are rotated against each other by 30 degrees (how can you produce those from scratch?). Click "all" in "atom/part/all". Now select action "delete links", then action "link nearest". Increase z by 1.2 (set z to 2.7). Now click "part" in "atom/part/all" and select action "copy". Set atom2=0, then select action "mirror at...". Since atom2 is not given, the part containing atom1 will be mirrored at the origin {0,0,0). Create six vertical links (between those six pairs of atoms of the two molecules which are closest) by selecting the appropriate numbers in "atom" and "atom2" and then clicking "+" in "+/-/*/-*/=" each time. Join two copies of this large molecule to obtain the carbon nanotube shown in project 19.
Exercise 7: add a few hexagons to project 5
We select "storage" option "d" to fill storage 1 with a regular hexagon (and storage 2 with a regular pentagon), then select "storage" option "+" to add a regular hexagon to the existing hexagonal network. Unselect "storage" option "t" and select storage option "n" to see the sequential atom numbers.
Use slider "z" or click "Z" to separate the new hexagon form the network and to be able to read the overlapping numbers. Now decide where you want to put the newcomer.
Let's say we want to shift it such that atom 39 lands on atom 19. For this we set atom1 to 39 and atom2 to 9. You will see a thin brown line connecting atom 39 with atom 19.
Now execute the shift by selecting action "move to atom2".
Finally, select action "merge closest" to merge the two molecules and eliminate the four overlapping atoms.
Exercise 8: create the 3D lattice of project 21 Select project 7 (cube). In setter bar "atom/part/all" click "part". In "axes etc" click "n" to display the numbers of the atoms. You will see that the central atom has the number 21. Select atom 1 = 21 to make this one the current atom. From "(delete)" select "keep n'hood". This leaves us with the current atom and six other atoms around it. In "storage" click "s" to save this configuration. In "storage" click "+" to add this configuration to our project. Click "X" four times to separate the two copies. Select action="merge close". In "storage" click "s", then "+". Click "Y" four times to separate the two copies. Click the repeat box next to "action". In "storage" click "s", then "+". Click "Z" four times to separate the two copies. Click the repeat box next to "action".
Permanent Citation
