Spheres Construction Set

Requires a Wolfram Notebook System
Interact on desktop, mobile and cloud with the free Wolfram Player or other Wolfram Language products.
Create three-dimensional regular or irregular structures made from up to 1000 colored spheres. About 100 prefabricated structures are available to help you get started.
[more]
Contributed by: Karl Scherer (March 2011)
Open content licensed under CC BY-NC-SA
Snapshots
Details
Snapshots
The snapshots show an example of how to use this constructor.
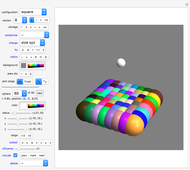
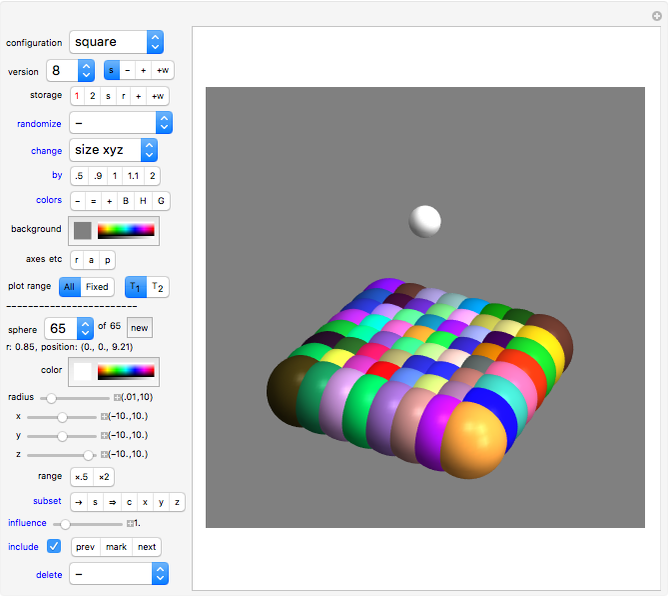
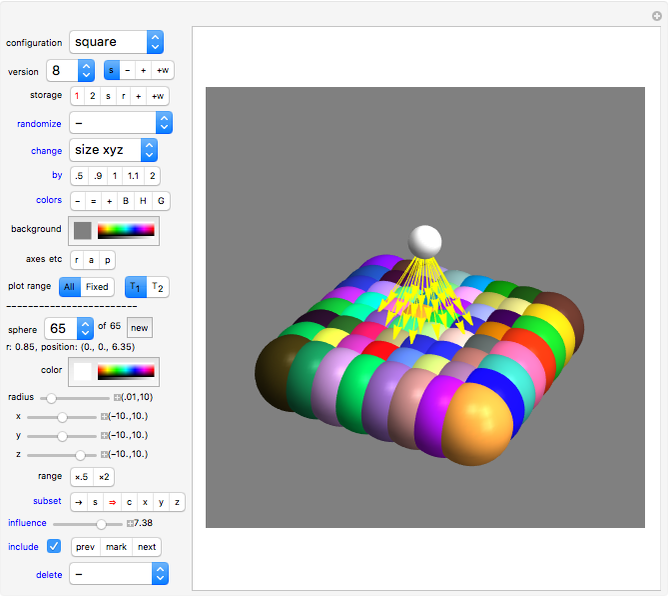
Snapshot 1: shows starting with a square configuration and creating a small white "probing" sphere placed above it by clicking the "new" button, then shifting the "z" slider; select color and radius (slider "r") to paint it white and make it smaller
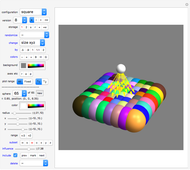
Snapshot 2: shows yellow arrows indicating the probe's "sphere of influence" (select subset = double arrow, and move the "influence" slider)
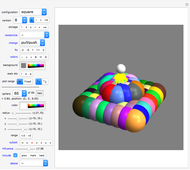
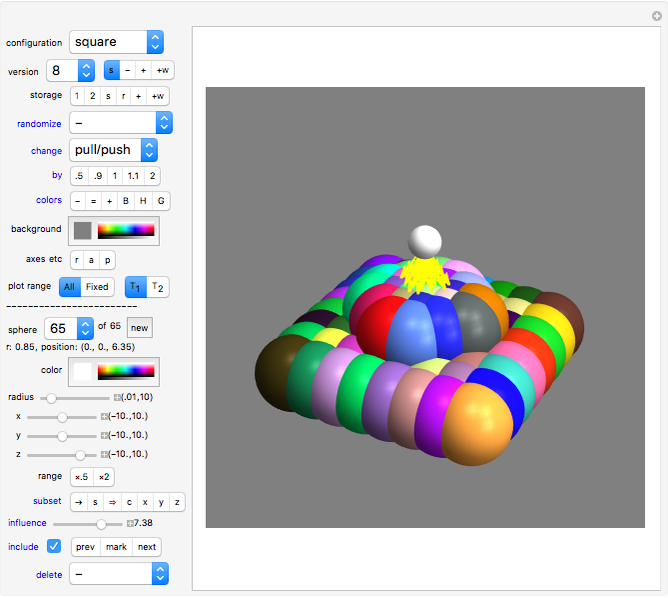
Snapshot 3: shows how the probing sphere has been used to partially pull out all spheres in its sphere of influence (change = push/pull)
Snapshot 4: shows how the white color of the probing sphere is infused into all connected spheres (the "colors" button is set to "=")
Snapshot 5: shows how the selected subset is rotated 45° around the probe (click "mark", then select "change" option "angle y", then click the "by" button "45 degrees")
Snapshot 6: shows how the selected rotated subset has been given hues ("colors" button is set to "H"), and the current (probing) sphere has been deleted (by clicking "current" in the "delete" setter bar)
The thumbnail shows three linked circles of spheres, each painted with its own range of hues.
Introduction
This Demonstration lets you create many varied three-dimensional arrangements of spheres.
You can build up your creations sphere by sphere (click "version" option "1" of any configuration), but it is often much faster to use the prefabricated configuration and edit it. You can then manipulate a single sphere or a whole group of spheres as one. A host of tools is offered for this purpose.
The operations available for a single sphere or groups of spheres include: deletion, pulling, pushing, resizing, shifting, changing angle, changing color, changing radii, tainting colors, perturbing positions, randomizing color, and randomizing radii.
The manipulation of a group of spheres is done by using an extra probing sphere; see "subset" below for descriptions of the "→" and "⇒" options.
"configuration" drop-down menu
Here you can call up a prefabricated configuration (which you can edit and to which you can add to as much as you like).
The options "line x", "line y", and "line z" arrange the spheres in a line in the  ,
,  , and
, and  directions.
The option "circle" arranges 36 spheres at regular distances around a circle.
The option "semicircle" arranges 19 spheres at regular distances around a semicircle.
The option "prism" arranges the spheres in a hexagonal prism.
The option "square" is the default. It arranges the spheres in a square.
The option "mesh" creates a netlike flat arrangement.
The option "hex mesh" creates a netlike flat arrangement with a hexagonal pattern.
The option "solid box" positions the centers of the spheres as a cube.
The option "sphere" positions the centers of the spheres regularly on the outside of a sphere.
The option "tube" positions the centers of the spheres regularly on a cylinder.
The option "cone" positions the centers of the spheres regularly on a cone.
The option "spiral" positions the centers of the spheres regularly on a flat spiral.
The option "spiral 2" positions the centers of the spheres regularly on another type of flat spiral.
The option "helix" positions the centers of the spheres regularly on a helix.
The option "dble helix" positions the centers of the spheres regularly on a double helix.
All spheres in these configurations have a radius of 2 units by default.
The more spheres you use (by selecting a higher "version" number), the more these configurations take shape.
You can use the "change" options (such as "size x", "size y", "size z", and "size xyz") together with the "by" buttons to change the shape of these configurations; see below.
Selecting a new configuration always triggers random colors for the spheres.
"version" drop-down menu
Select the configuration version. Higher version numbers mean more spheres are used.
The number of spheres currently used is displayed further down in the "sphere" drop-down menu.
"s", "-", "+", "+w" setter bar
When button "s" (show) is active, then any selected configuration/version is displayed immediately and overwrites any existing image.
When button "-" is active, you can change the "configuration" and "version" selections without any effect.
Clicking button "+" (add) adds the selected configuration version to the existing creation. The colors of the spheres are randomly selected.
Clicking button "+w" (add) adds the selected configuration version in white color to the existing creation.
The monochrome color allows you to edit all spheres in the added set simultaneously (see the "subset" setter bar).
"storage" setter bar ("1", "2", "s", "r", "+", "+w")
Buttons "1" and "2" denote the two storage places available where you can save your construction. Click "1" or "2" and the button will turn red. You can store only two creations. The other buttons will only affect the highlighted storage.
You can save (click "s") and restore (click "r") your creation.
Clicking button "+" adds your stored creation to your existing creation.
Clicking button "+w" adds your stored creation in white to your existing creation. The monochrome color allows you to edit all spheres in the added set simultaneously (see the "subset" setter bar).
subset-sensitive (blue) controls
Some control labels are blue. These controls can work on the whole creation or only on a subset of it.
A subset is defined by the buttons of the "subset" setter bar: "→", "s" "⇒", "c", "x", "y", "z" (see details below).
The subset types are: closest sphere ("→"), spheres in range ("⇒"), spheres of same color ("subset = c"), and spheres with the same  ,
,  , or
, or  coordinate.
Clicking button "s" takes the sphere nearest to the current one and makes it the new current sphere.
In all cases, the subsets to which the blue controls apply are marked in the graphics display by yellow arrows pointing from the current sphere to all other spheres in the subset.
"randomize" drop-down menu
The "randomize" options are subset dependent. If a subset has been selected, only the spheres in the subset will be affected by the "randomize" options. If no subset has been selected, the following apply to all spheres:
Select "color" to randomize the color of the spheres.
Select "hue" to change the color of the spheres to a random color with full saturation.
Select "graylevel" to change the color of the spheres to a random gray value between black and white.
Select "radii" to randomize the radii of the spheres (this creates radii between 0.5 and 1.5).
Select "perturb xyz" to randomly change the positions of the spheres by 0.5 units or less in each direction.
Selecting one of the options "perturb x", "perturb y", or "perturb z" causes perturbations by up to 0.5 units in only one direction.
Selecting "perturb d" randomly changes by up to 10 percent the distance of the selected spheres to the origin.
Select "x, y, z" to randomize the positions such that -10 <=  ,
,  ,
,  <= 10.
Selecting one of the options "x", "y", or "z" randomizes the  ,
,  , or
, or  component of the positions between -10 and 10.
Selecting "d" changes the distance (of the selected spheres) to the origin randomly by up to 50 percent.
"change" drop-down menu
Here you can select what you want to change: the radii of the spheres, the size of your creation or part of it, its position, or its angle.
The "change" and "by" controls belong together. Clicking one of the "by" buttons tells the system by how much you want a parameter to change. This change is then executed immediately.
Change-option "radii"
Button ".5" decreases each sphere's radius to half its size.
Button ".9" decreases each sphere's radius by 1/10.
Button "=" sets the radius of each sphere to the radius of the special sphere selected (see lower-left border).
Button "1.1" increases each sphere's radius by 1/10.
Button "2" doubles each sphere's radius.
Change-options "size xyz", "size x", "size y", "size z"
Together with a "by" button clicked, this option enlarges or decreases the size of your creation or part of it. For example, clicking ".9" of the "by" setter bar reduces the size of your creation in the  direction by 10 percent.
Change-option "size xyz" changes all dimensions simultaneously.
In detail: first the center of mass of your creation or part of it is calculated. Then the distance (in  ,
,  ,
,  , or all directions) from each sphere to the center of mass is changed.
Change-options "shift x", "shift y", "shift z"
When a "by" button is clicked, this shifts your creation or part of it in the selected direction.
Change-options "angle x", "angle y", "angle z"
When a "by" button is clicked, this rotates your creation or part of it around the associated axis. The rotation steps are measured in degrees.
Change-option "push/pull"
This option executes a push or pull on all spheres of the selected subset, away from or toward the current sphere. If no subset is selected, the current sphere pushes or pulls all other spheres.
".5" pulls all spheres or the spheres of the selected subset halfway to the position of the current probing sphere.
".9" pulls all spheres or the spheres of the selected subset 1/10 closer toward the current probing sphere.
"1" has no effect.
These actions are very useful in manipulating a single sphere or for deforming a whole group of spheres at once.
"1.1" pushes all spheres or the spheres of the selected subset away to a distance 1.1 times the current distance.
"2" pushes all spheres or the spheres of the selected subset away to a distance twice the current distance.
"by" setter bar
The buttons of the "by" setter bar control how much the property selected in the "change" drop-down menu will be altered (see details above).
"colors" setter bar
Clicking button "-" darkens all sphere colors.
Clicking button "=" sets the color of each sphere to the color of the selected sphere. Exception: button "=" does not work when subset "c" (color) is activated; in this case the coloring of a monochrome subset is accomplished by using the "color" slider.
Clicking button "+" makes all sphere colors lighter.
Clicking button "B" (blend) slightly taints the selected spheres with the color of the selected sphere (see lower-left border). Click the button repeatedly for more intense staining.
Clicking button "H" (hue) blends each sphere's color with a different random color. This button makes it easy to create a more natural look for the spheres. For example, to create a different reddish color for each sphere, first select red from the "color" slider of the current sphere, then click the "colors" button "=" to paint them all red, then click the "include" button, and finally click the "colors" hue button "H".
Clicking button "G" (blend) replaces each sphere's color with the associated grayscale.
"background"
Sets the background color.
"axes etc" options
Clicking button "r" shows rulers, clicking button "a" shows the coordinate system arrows (x = red, y = green, z = blue arrows), and clicking button "p" displays a gray square in the  -
- plane. Each of these three buttons can be independently switched on or off.
"plot range" options
"All" always displays all spheres in their entirety. This might cause the view to change when you enlarge a sphere and so on.
"Fixed" always shows the same view of all data displayed in a 14x14x14 box (containing the 10x10x10 plot range). Very large spheres might be partially cut.
Test buttons  " and
" and  "
Click the
  " button to temporarily reduce all radii to 1/5 of their size.
This way you can better see where the spheres are placed, especially when they intersect or even contain each other.
Also, any arrows are more visible (see subset options "→" and "⇒" below).
Most controls are unavailable when in test mode. Exceptions are:
• the usual 3D rotation, zoom, and pan operations
• all "axes etc" controls
• "plot range" controls
• current sphere selections "next" and "prev" (changes to current sphere selection are undone when returning from test mode)
Click the
  " button to revert to your normal display.
The following controls act on single spheres:
"sphere" drop-down menu
Here you choose which sphere you want to edit. It is called the "current" sphere.
Right next to this menu the total number of spheres is given ("of...").
"new" button
If you click the "new" button next to the "sphere" drop-down menu, a new sphere (with the same color and radius as the current one) is created at position {0,0,0}.
This sphere is then the current one.
If the current sphere is marked by an arrow (option "mark" active, see description further down), then the new sphere will be at the same position as the current sphere.
Status of current sphere
The radius and position of the current sphere are displayed below the "sphere" drop-down menu.
"color" slider
Here you can choose a new color for the current sphere.
If "subset = c" is active (red), then this "color" slider defines the color of the whole monochrome subset (consisting of all spheres with the same color as the selected sphere). Move your mouse around the "color" slider to see the immediate changes.
"radius" slider
Here you can edit the radius of the current sphere (values between 0 and 10).
At the start of the Demonstration the "radius" slider is set to 2.
"x", "y", "z" sliders
Here you can edit the  ,
,  ,
,  position of the current sphere (all values between -10 and 10).
You can double or half the range of the "x", "y", and "z" sliders with the "range" buttons "×2" and "×.5", see below. When they appear on the screen, at first the system-generated configurations are contained in the cube {0,12}x{0,12}x{0,12}. However, you can enlarge the creation and you can place spheres outside this cube.
"range" slider
Click "×2" to double the range of the "x", "y", and "z" sliders. Click "×.5" to half the range of the "x", "y", and "z" sliders. The default range is {-10,10}. The changed ranges for the sliders are displayed next to the sliders.
The sizes of the red/green/blue coordinate axes (axes = "b" or axes = "ab") reflect the extent of the new slider range.
"subset"
Here you can define a subset of your creation that you can then edit as a whole.
The button "→" turns red when clicked; click it again or click another button to turn it off. The button causes a red arrow to be drawn from the current sphere to the nearest sphere.
Click the button "s" to make the nearest sphere the new current sphere.
Button "⇒" turns red when clicked; click it again or click another button to turn it off. Clicking the button causes a red arrow to be drawn from the selected sphere to the nearest spheres, with the condition that their centers have to be closer to the probing sphere than 5 times the radius of the (probing) current sphere.
In short, while the "⇒" button is red (active), the radius of the probing sphere determines the sphere of influence of the probing sphere and hence the number of red arrows between the probing sphere and any other spheres.
Button "c" turns red when clicked; click it again or click another button to turn it off. Yellow arrows are now drawn from the current sphere to all spheres with the same color. These spheres with the same color comprise your selected subset. Pick a color from the "color" slider to change the color of the whole monochrome subset simultaneously. Note that the "colors" button "=" does not work when subset "c" (color) is active! All other subset-related (blue) controls work.
If you select subset "x" (or "y" or "z"), then your subset consists of all spheres with a similar  (or
(or  or
or  ) coordinate as the current sphere. The coordinate may only differ by the amount given by the "influence" slider. Yellow arrows are drawn from the current sphere to all spheres with a similar coordinate.
"influence" slider
This slider controls the (ball-shaped) area of influence of the current sphere.
The larger this value, the more spheres will be in the set of spheres nearest to the current sphere. The range is {.01,10}.
Example: If you want to restrict the subset to spheres with the same  coordinate as the current sphere, move the "influence" slider fully to the left and then select subset "x". If you set the slider to 1, then the subset will contain all spheres whose
  coordinate differ from the
  coordinate of the current probing sphere by 1 or less.
"include"
This determines whether the current sphere is included in any subset editing. Exceptions: • The editing of the nearest sphere (subset = "→" active) always excludes the current sphere. • Coloring a monochrome subset (with subset = "c") always includes the current sphere. • The "change" selection "push/pull" does not move the current sphere.
"prev", "mark", "next"
Click the "prev" or "next" button to select the previous (or next) sphere as the current sphere. The result is the same as selecting the previous (or next) current sphere from the "sphere" drop-down menu. However, clicking "prev" or "next" is much faster. This, together with the "mark" option activated, allows you to find the number of any sphere in your creation very quickly.
Selecting the powerful option "mark":
• turns the "mark" button red,
• creates an orange arrow marking the current sphere in the 3D graphics,
• makes the current sphere's position the target position for adding new components (when "mark" is active, any newly added configuration is centered at the current sphere's position instead of the origin); this powerful feature allows you to combine configurations very quickly and easily,
• causes any rotations (options change = "angle x", change = "angle y", change = "angle z") to be executed with the current sphere as its center, and
• causes any new sphere (options "new") to be created at the position of the current sphere.
Using the current sphere as a "probe"
To find the sequence number of a sphere, simply bring a small "probing sphere" close to the sphere in question, check (with the red arrow) that your target is close to the probe, then click "s" to make the target sphere the currently selected one. Now you know its number (it is displayed in the drop-down menu), and you can change its color, radius, and position.
By using a probing sphere (you might want to create one for this purpose) you can also push and pull ("change" selection "push/pull") the target spheres by clicking one of the "by" buttons. To manipulate a whole group of spheres, click subset "→" (nearest sphere) or "⇒" (all spheres in range) or "c" (spheres with same color) first; see the description above.
These tools are very similar to the functions of an atomic force microscope (AFM), which can manipulate single atoms lying on a solid surface by using a very sharp probing tip.
"delete" drop-down menu
The option "current" deletes the currently selected sphere. However, you cannot delete the last remaining sphere.
The option "-> current" deletes all spheres that have numbers smaller or equal to the current sphere. The current sphere is deleted only if "include" is active.
The option "current ->" deletes all spheres that have numbers greater or equal to the current sphere. The current sphere is deleted only if "include" is active.
The "option "rest" deletes all spheres that are not in the currently selected subset. The current sphere is not deleted if "include" is active. If no subset is selected, then all spheres (except the current one) are deleted.
The option "subset / all" deletes all spheres in the selected subset. The current sphere is deleted only if "include" is active. If no subset is selected, then all spheres (except the current one) are deleted.
Hints
Sliders have a limited range. You can set a slider to a value outside its sliding range, however, by clicking the small "+" sign next to it and manually keying in a new value. When you exit this procedure, the slider might glow red, which indicates that it is out of its normal range. This has no negative affect on the Demonstration, though. Note that there is also a "range" setter bar to change the range of the sliders for the x, y, and z coordinates of the current sphere.
If you have hundreds of spheres displayed, the system might take some time to execute a button click. If you click buttons too fast, a button can get "stuck". In this case click another button (like the neutral "1" button of "size x") to release it.
To recolor a monochrome subset of spheres uniformly with another single color, first make sure that the current sphere is part of this group. Select subset "c", then click the color picker anywhere. (Using randomize = "c", however, gives every sphere in your subset a different random color.)
When moving spheres or when changing a sphere radius, it can happen that two spheres overlap or even that one sphere is totally enclosed by another. It can seem that a subset function is not working because the yellow arrows are hidden in the larger sphere. Use the test button  ") to make the arrow(s) visible.
Allow the system time to react. If a button seems to be stuck, click another button.
Permanent Citation
