Three Crossings Puzzle


Requires a Wolfram Notebook System
Interact on desktop, mobile and cloud with the free Wolfram Player or other Wolfram Language products.
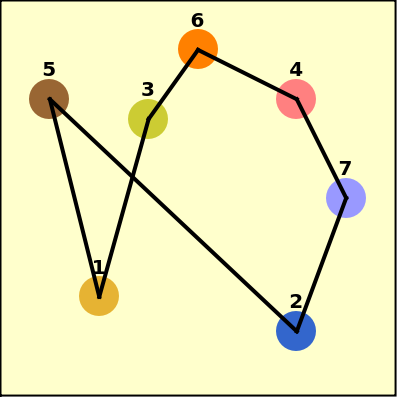
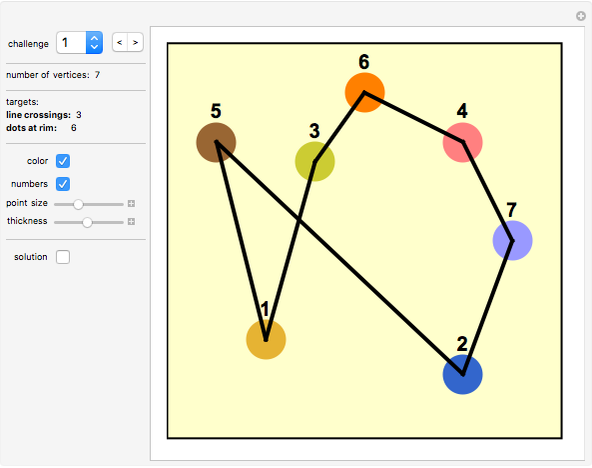
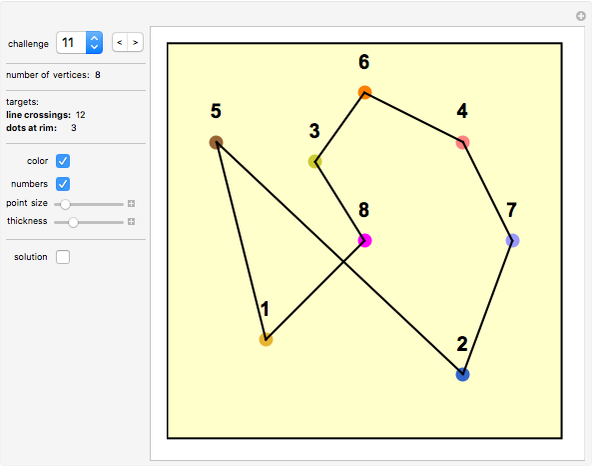
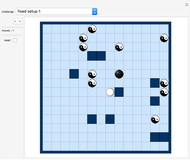
You are asked to maneuver the colored dots so that the board contains three line crossings.
[more]
Contributed by: Karl Scherer (June 2015)
Open content licensed under CC BY-NC-SA
Snapshots


Details
Introduction
Seven challenges use seven vertices, and five challenges use eight vertices.
Challenge #Lines Crossings Balls-at-rim -------------------------------------------------------- 1 7 3 7 2 7 4 6 3 7 5 4 4 7 6 3 5 7 7 6 6 7 11 4 7 7 12 5 8 8 7 6 9 8 9 5 10 8 11 4 11 8 12 3 12 8 13 6
To move a vertex (one of the seven dots), drag it and see that the connecting lines change. Here is how they change:
No matter which dot you move, the dot numbered "1" is connected to the closest dot, which is then connected to a third dot, which is the closest of those dots that are not contained in the connected chain of dots yet. Finally, the last dot remaining is connected to the first.
If you move a vertex to the rim of the board, its accompanying dot turns green.
You Check a Win
The system does not check the number of intersections of lines. There is no win message. It is easy enough to check this with your own eyes.
Controls
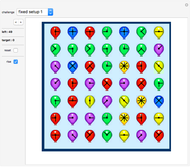
Click popup menu "challenge" or "" to select a task.
The next line shows the number of vertices you are given.
"line crossings" denotes the number of line crossings you have to achieve.
"dots at rim" shows how many of the dots (vertices) should be placed at the rim of the board (expert levels).
Click toggle "color" to show the dots in various colors (or just red).
Select "numbers" to see the sequential numbers of the dots.
Slider "point size" controls the size of the colored round dots.
Slider "thickness" controls the thickness of the edges connecting the dots (very useful in crowded situations, where you should keep the line thickness to a minimum).
"Solution" button: only the solution to challenge 4 is available.
Permanent Citation
"Three Crossings Puzzle"
http://demonstrations.wolfram.com/ThreeCrossingsPuzzle/
Wolfram Demonstrations Project
Published: June 25 2015
 Passages Puzzle
Karl Scherer The Ray Puzzle
Karl Scherer Graph Puzzles
Karl Scherer Penrose's Train Challenge
Karl Scherer, Antonin Slavik, and Stan Wagon The Catenax Puzzle
Karl Scherer Seating Friends around a Table
Izidor Hafner Slide and Swap on Cubic Graphs
Jacob A. Siehler Mondrian Art Problem
Ed Pegg Jr One Disk Per Diagonal
Wai-Shun Cheung Three-Color Territory Puzzle
Karl Scherer
-
 Polyhedral Playground
Karl Scherer -
 Tiling Constructor, Tile-Dragging Variant
Karl Scherer -
The Catenax Puzzle
Karl Scherer -
 Angel Puzzle
Karl Scherer -
 Constructing and Manipulating Graphs
Karl Scherer -
 3D Construction Set
Karl Scherer -
 Blended Quadrilaterals
Karl Scherer -
 Rotating Polyhedra in Space
Karl Scherer -
 The Misdirection Game
Karl Scherer -
 Tensegrity
Karl Scherer -
 Nowhere-Neat Tilings
Karl Scherer -
 Pocket Calculator
Karl Scherer -
 Area Puzzle
Karl Scherer -
 Molecule Construction Set
Karl Scherer -
The Ray Puzzle
Karl Scherer -
 Animated Model of an Industrial Robot Arm
Karl Scherer -
 Model of an Industrial Robot Arm
Karl Scherer -
 Color-Blended Circular Tiles
Karl Scherer -
 Rep-Tiles
Karl Scherer -
 Armed Balloons Puzzle
Karl Scherer